The main recipe
Cottage Pie Recipe
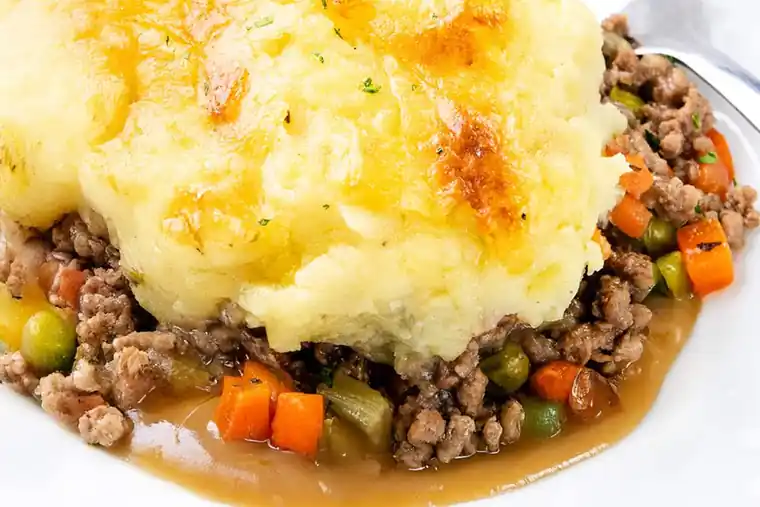
Cottage pie is a baked dish of beef mince in gravy, topped with mashed potato. The filling is savoury and rich, with onion, carrot and celery softened into the sauce. The topping is plain mashed potato, forked into ridges and baked until golden.
It is a straightforward dish to cook at home. Most of the work is simple preparation: chopping vegetables, browning mince and boiling potatoes. The oven does the last stage while you clear up. Cottage pie traditionally uses beef; shepherd's pie traditionally uses lamb. The method is much the same for both, but the meat is different, and so is the name.
This recipe serves four people generously. The filling is thick enough to spoon out in tidy portions, and the mash sits on top as a separate layer rather than sinking into the gravy.
The Recipe
* Times are a guide — ovens vary, so judge each stage by the cues in the steps as well as the clock. Most of the cooking overlaps: the filling simmers while the potatoes boil. Oven: 200°C conventional / 180°C fan / Gas Mark 6.
Scaling changes ingredient quantities only. It does not change oven temperatures, cooking times or the dish size — those may need separate adjustment. See Scaling the Recipe below.
Equipment
- A large frying pan or wide, heavy casserole — room for 500g of mince.
- A large saucepan for the potatoes; a colander; a potato masher; a wooden spoon and a fork.
- An ovenproof dish of about 2.5 to 3 litres, roughly 20 × 30 cm.
- A baking tray to stand the dish on, to catch any drips if the filling bubbles over.
The dish size matters. Too small, and the layers are deep and slow to heat through. Too large, and the filling spreads thin and can dry out. Aim for the filling to sit about 2.5 cm deep before the mash goes on, giving a finished pie about 4.5 to 5 cm deep.
Ingredients — for the beef filling
Ingredients — for the mashed potato topping
Optional ingredients
Method
Two parts of this method overlap, and that is deliberate. The potatoes (Steps 6 to 8) are cooked while the filling simmers (Step 4), not after it. When the filling goes on to simmer, move straight to the potatoes — that overlap is how the total time works.
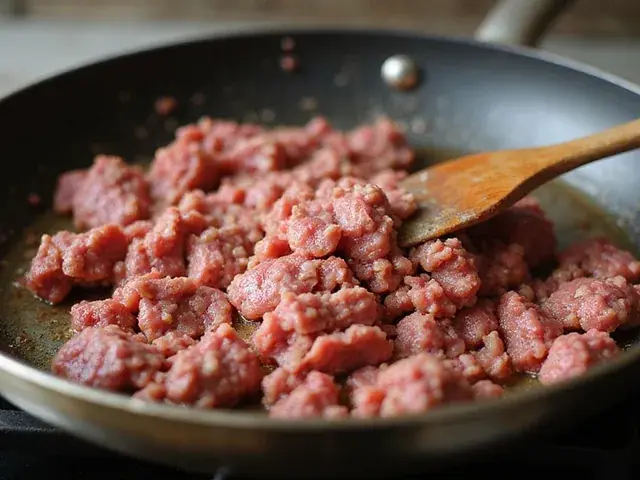 Brown the mince. Heat the oil over a medium-high heat. Add the mince, break it up, and spread it out rather than piling it in the middle. Cook for 6 to 8 minutes until browned all over with no pink remaining. If the pan looks crowded, brown in two batches — packed mince releases liquid and boils in its own juices instead of browning. Spoon off any large amount of fat, leaving a little behind.Cue: the mince should smell savoury and roasted, not steamed.
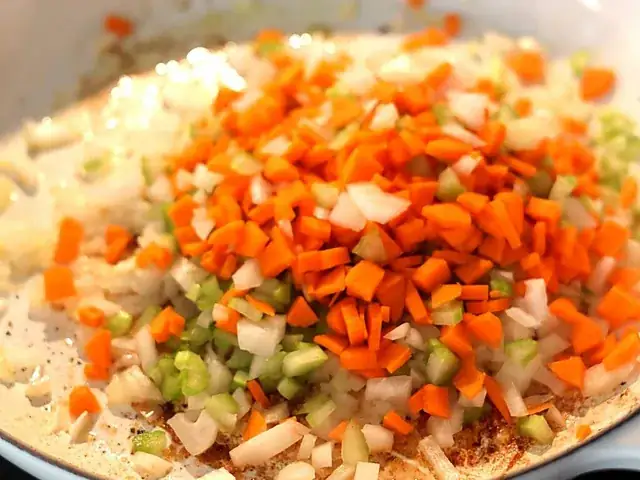 Soften the vegetables. Turn the heat to medium. Add the onion, carrots and celery and cook for 7 to 8 minutes, stirring now and then. Add the garlic for the final minute.Cue: the onion should look soft and translucent; the carrot and celery should lose their hard, raw edge. Garlic should smell fragrant, not bitter.
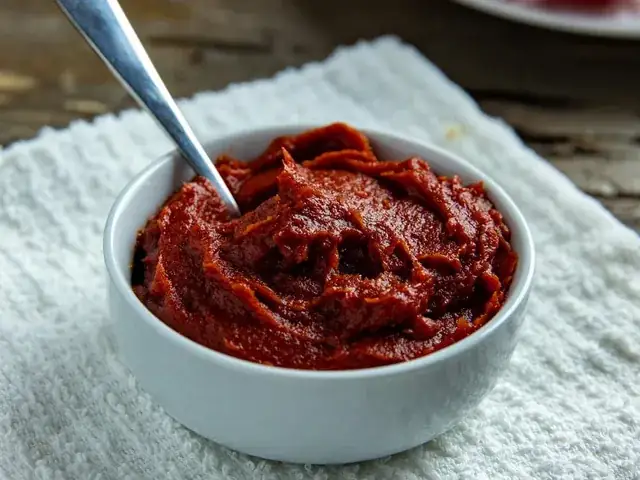 Add flour and tomato purée. Sprinkle the flour over everything, stir in and cook for 1 minute to cook out the raw taste. Add the tomato purée and Worcestershire sauce, stir through, and cook for another minute.Cue: the purée darkens slightly and coats the mince.
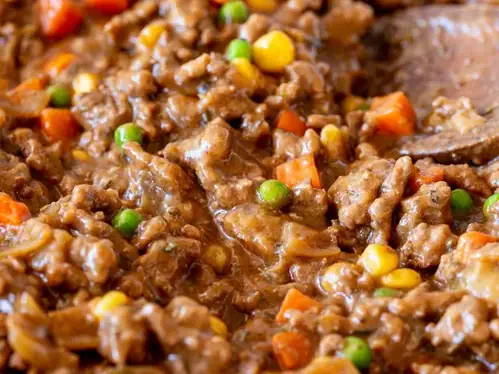 Add stock and simmer. Pour in the hot stock, add the thyme and bay leaf, and season lightly. Bring to a gentle simmer and cook for 20 minutes, stirring occasionally. Do not boil hard.Cue: the gravy should coat the mince like a sauce, not surround it like soup. A spoon drawn across the pan should leave a trail that fills in slowly. If it is still thin, simmer 5 more minutes without a lid.
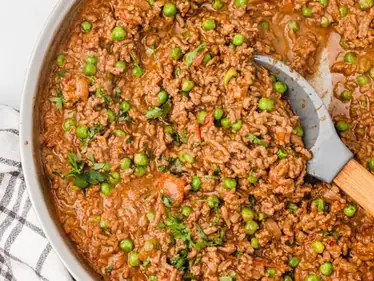 Finish the filling. Stir in the frozen peas and cook for 2 minutes. Take the pan off the heat, fish out the bay leaf, and taste. Add salt, pepper or Worcestershire sauce if needed — this is your last easy chance to fix the seasoning. Leave the filling to stand while you finish the mash.Cue: the filling should stop steaming fiercely. A boiling-hot filling melts the base of the mash and blurs the layers.
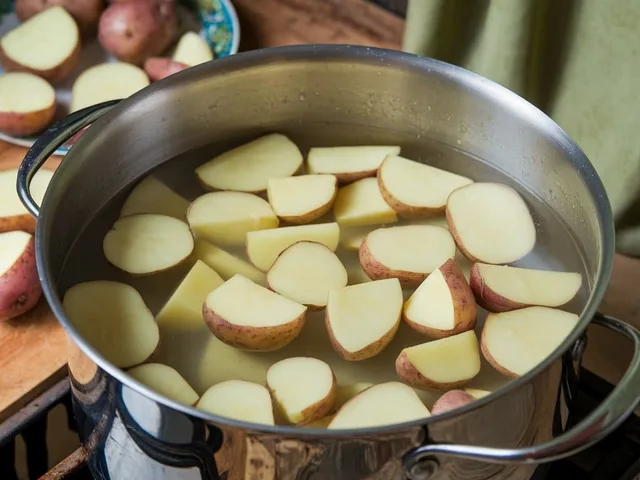 Cook the potatoes. While the filling simmers, peel the potatoes and cut them into similar chunks, about 4 cm across. Cover with cold water, add a good pinch of salt, bring to the boil, then simmer for 15 to 20 minutes.Cue: a knife should slide into the largest chunk with no resistance, and the chunk should feel as if it might break apart.
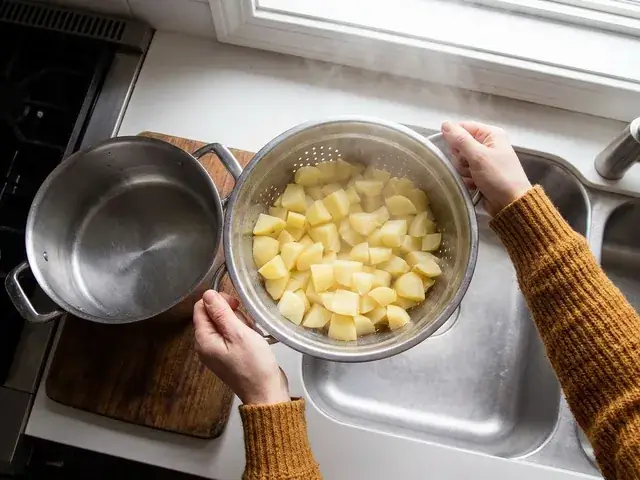 Drain and dry. Drain thoroughly in a colander, tip the potatoes back into the hot, empty pan, and put it over a low heat for about 1 minute, shaking gently once or twice.Cue: steam rises off the potatoes and the surfaces look matte and floury, not shiny and wet. Wet potatoes make wet mash.
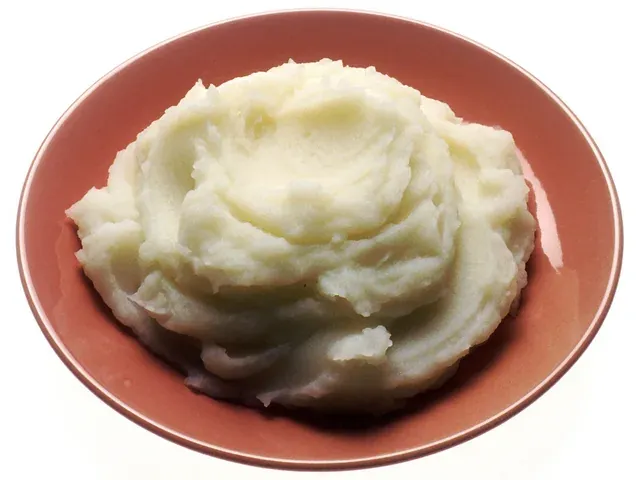 Mash. Take the pan off the heat, add the butter and mash until there are no lumps. Pour in the warm milk a little at a time, beating as you go. Stop when the mash is smooth and soft. Season and taste.
If you are using them, stir the pinch of nutmeg or the teaspoon of English mustard into the mash now, along with the butter and before the milk goes in. Both are optional. The pie is complete without either.
Cue: the mash should hold its shape on a spoon without being stiff. You can always add more milk; you cannot take it out.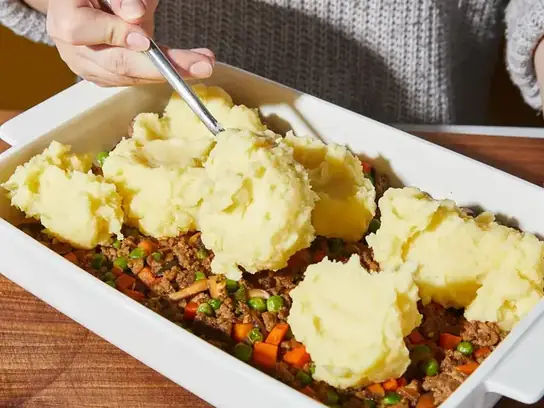 Assemble. Heat the oven to 200°C conventional / 180°C fan / Gas Mark 6. Spoon the filling into the dish and spread it level. Spoon the mash on top in large dollops, starting around the edges and working inwards, then spread it gently to the sides so it seals the filling in. Run a fork across the whole surface to make ridges, peaks and grooves. Scatter the optional cheese over the top now, if using.Cue: those rough forked edges are what turn crisp and golden.
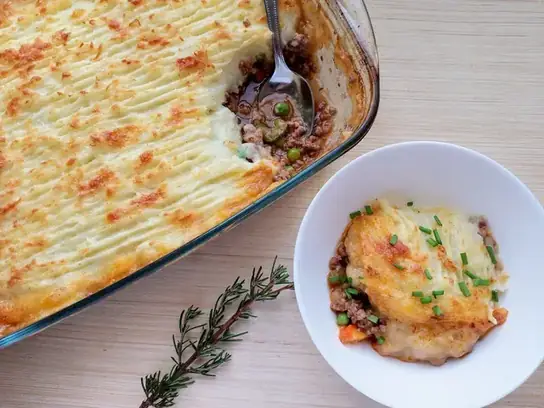 Bake. Stand the dish on a baking tray on the middle shelf. Bake for 25 to 30 minutes.Cue: the top is golden brown in places and the gravy is bubbling up around the edges. If the filling bubbles but the top is still pale, give it 2 to 3 minutes under a hot grill, watching closely.
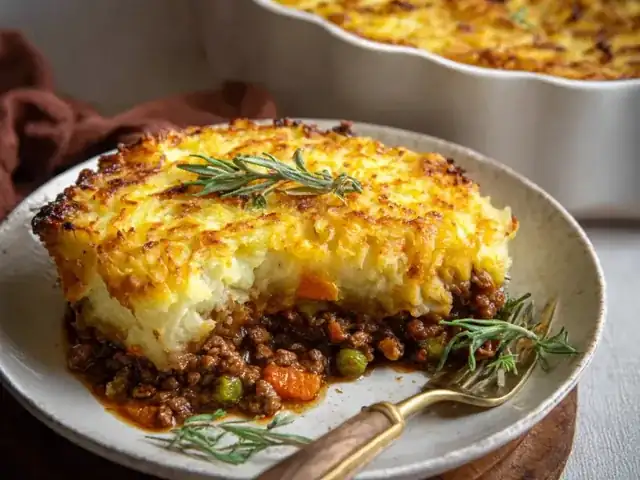 Rest and serve. Leave the pie to stand for 5 to 10 minutes. The filling settles and thickens slightly, so portions spoon out neatly instead of running across the plate. Serve straight from the dish, standing it on a mat or board.
Recipe notes. Season in stages — stock varies a great deal in saltiness, and you cannot remove salt once it is in. Check the centre is properly hot before serving: steady bubbling right around the edges, not just in one corner. A pie baked from chilled needs longer — see Making Ahead below.
Ingredients and what each one does
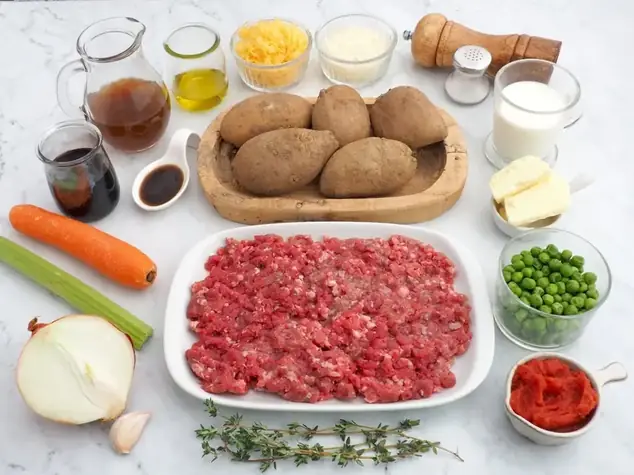
Beef mince
The mince is the base of the dish and provides the savoury depth the gravy builds on. Fat content makes a real difference. Very lean mince, such as 5% fat, gives a lighter filling but can taste dry after a long simmer. Mince at around 10 to 15% fat stays moister and browns well. Neither choice is wrong: with leaner mince, be careful not to over-reduce the gravy; with fattier mince, spoon off the excess fat after browning. Whichever you buy, brown it properly — grey, steamed mince gives a flat-tasting filling whatever else you add.
Onion, carrot and celery
These three form the flavour base. Onion brings sweetness once it softens, carrot adds a little sweetness and colour, and celery gives a savoury background note that is hard to name but easy to miss. Cut them small and evenly: large chunks of carrot stay hard in the time available and make the filling awkward to spoon. Garlic supports the same base and should be noticeable but never dominant.
Tomato purée, stock and thickening
Tomato purée adds depth, colour and gentle acidity; two tablespoons is plenty, and cooking it briefly in the hot pan removes the sharp, metallic taste of raw purée. Stock is the liquid of the gravy and a large part of its seasoning — stock cubes and pots are usually saltier than fresh stock, so season in stages and taste again at Step 5. The plain flour, stirred into the fat before the stock goes in, thickens the gravy with a soft, rounded texture and is the traditional thickening for this kind of filling. Cornflour is the alternative for a gluten-free version and behaves differently; see Substitutions.
Worcestershire sauce and herbs
Worcestershire sauce adds a savoury, slightly sharp background flavour; one tablespoon is enough, as more can push the filling towards a pickled taste. Note that it traditionally contains fish, usually anchovy — that matters for anyone avoiding fish, and for a vegetarian version. Thyme suits beef and stands up to simmering; dried thyme is reliable, fresh is milder. The bay leaf works quietly in the background and must come out before assembly.
Potatoes, butter and milk
Floury potatoes make the best mash for a topping. Maris Piper and King Edward break down as they cook, mash smoothly and take up butter and milk well. Waxy and salad potatoes hold their shape instead, which is useful in a salad but leaves mash lumpy or gluey. If you are unsure what you have bought, check the bag — most supermarket potatoes are labelled with variety and best use. Butter gives the mash flavour and a softer texture; warm milk loosens it evenly, whereas cold milk cools the potatoes and can make the mash heavy. Cream can replace some of the milk for a richer topping, but it is not necessary.
Cheese
Cheese is optional, not essential, and traditional versions often have none. Mature Cheddar is the usual choice: 50g has enough flavour to be noticed and browns well. Scatter it over the forked surface, where it will crisp, rather than mixing it through the mash.
How to make the beef filling well
Preparing the vegetables
Dice the carrot and celery to roughly the size of a pea, and chop the onion finely, as it will soften and partly melt into the sauce. Small, even pieces cook at the same rate and distribute through the filling, so every spoonful has some vegetable in it. Prepare everything before the pan goes on — browning mince needs your attention, and it is easy to burn garlic while you are still chopping celery.
Browning the mince effectively
Browning is a chemical change, not just a colour change. Hot, dry contact with the pan creates the deep savoury flavours a simmer alone never produces. Three things make it happen: the pan must be properly hot before the mince goes in; the mince must be spread out, not heaped; and you must leave it alone for a minute or two at a time rather than stirring constantly, so the surfaces in contact with the pan can actually brown. Break up large clumps early. Beyond that, patience does more than stirring.
Avoiding overcrowding and managing fat
Overcrowding is the most common reason mince steams instead of browning. 500g fits a large frying pan, but only just; if your pan is medium-sized, split the mince into two batches and return everything to the pan afterwards. If liquid pools around the mince, pour it off into a jug, keep browning, and add it back with the stock. After browning, if there is a visible pool of fat, spoon most of it off and leave roughly a tablespoon behind — the vegetables cook in it and the flour needs some fat to coat it. With lean mince there may be almost none to remove, so add a small extra drizzle of oil before the vegetables go in.
Simmering to the right consistency
How thick should cottage pie filling be? It should coat the mince like a sauce, not surround it like a soup. Simmer gently and uncovered for most of the 20 minutes: a lid traps steam and slows reduction, and a hard boil does not thicken faster at this volume but can break the mince into a grainy texture. Remember the filling thickens a little more as it stands, so judge it slightly looser than your final target — but only slightly.
Checking the seasoning before assembly
Taste the filling at the end of Step 5, once it has cooled for a few seconds. Ask three questions: is it salty enough, does it taste flat, and does anything dominate? Flat usually means salt or acidity; a little more Worcestershire sauce fixes the acidity. Dominance usually means too much of one herb, which is hard to reverse, so add herbs in the stated quantities first. Do this now — after assembly, the only seasoning you can still adjust is on the mash.
Why a watery filling causes problems
A watery filling does not stay under the mash. It soaks into the base of the potato, turning it grey and slack, and it bubbles up through the topping and spills over the dish. You get soup at the bottom and dry potato on top, instead of two distinct layers. Reducing the filling properly prevents all of it, and makes the rest of the dish much easier.
How to make the mashed potato topping well
Cutting and cooking the potatoes
Cut the potatoes into similar chunks, about 4 cm. Even chunks finish together; if some are much smaller, they break down into the water while the large ones are still hard in the middle, and that waterlogged potato is one cause of gluey mash. Start them in cold, well-salted water so they heat through evenly and absorb seasoning as they cook, and keep the water at a simmer rather than a rolling boil, which bashes the chunks apart. Test the largest chunk, not the smallest: a knife should meet no resistance and no chalky core. If in doubt, cook for two more minutes — slightly overcooked floury potatoes still mash well; undercooked ones never do.
Draining and drying
Drain the potatoes as soon as they are ready; do not leave them sitting in their cooking water, as they keep absorbing it and turn heavy. The minute back over a low heat is the most valuable minute in the topping. You should see steam rising and the surfaces looking matte and floury rather than shiny and wet. Skip it, and the mash needs less milk, browns less, and is more likely to slump.
Adding butter and milk, and avoiding gluey mash
Mash the butter in first — it coats the potato and gives a smoother result than adding butter and milk together. Then add warm milk a splash at a time, beating after each addition, and stop as soon as the mash is smooth and spreadable. You may not need all 75ml; varieties and cooking times vary. Gluey mash is usually overworked or made from the wrong potato: a food processor or electric whisk breaks the cells down too far and releases starch, turning the mash elastic. Use a hand masher, or a ricer if you have one, and work only until the lumps are gone. Once mash has turned gluey it cannot be reversed, so the remedy is prevention and a lighter hand.
How thick the mash should be
The finished mash should be soft but self-supporting. Lift a spoonful and turn the spoon sideways: the mash should hold its shape for a moment before settling. If it pours or slumps flat at once, it is too wet to top a pie well. If it stands in stiff peaks and will not spread, it is too dry — add a splash more milk. Spread it while warm; cold mash is stiff, tears the surface of the filling, and is far harder to seal to the edges.
Assembling and baking in more detail
Preparing the dish and adding the filling
You do not need to grease the dish; the filling contains enough fat to stop it sticking badly. Check it is ovenproof and the size you think it is — if unsure, measure a litre of water into it. Put the empty dish on a baking tray before you fill it: a full, hot dish is awkward to balance, and the tray catches any overflow. Spoon the filling in, level it, and push it into the corners so there are no air gaps. It should sit about 2.5 cm deep, with the mash bringing the finished pie to about 4.5 to 5 cm, and be warm rather than boiling.
Should the filling cool completely before adding the mash? No. It should stop steaming fiercely, but it does not need to be cold. Warm filling under warm mash bakes evenly and keeps the layers distinct. Cold filling is a different case and needs longer in the oven — see Making Ahead.
Spreading the mash and forking the top
Dollop the mash on in spoonfuls, starting at the edges. This is not fussiness: starting in the middle and dragging outwards pulls the filling up through the potato. Spread with the back of a spoon using short, light strokes, and work the mash right to the sides — that seal matters, because an open gap is where the gravy escapes and bubbles through. If a little filling shows through, patch it with a small spoonful of mash. Then draw a fork across the surface in lines, swirls or a crosshatch, pressing lightly: you want texture, not furrows down to the filling. The thin edges of those ridges dry and colour first, and give the top its crispness. If using cheese, scatter it evenly over the forked surface and check the pie a few minutes earlier, as cheese browns faster than potato alone.
Position, bubbling and checking the centre
Use the middle shelf for the most even heat, and leave space around the dish where you can — a dish pushed against the back wall of a small oven often browns unevenly on that side. The filling will bubble as it heats; around the edges, that is your sign of readiness. Leave at least 1 cm between the top of the mash and the rim to avoid a boil-over. Colour alone is not a reliable test: look for steady bubbling right around the edges. With a food probe, the centre should read at least 75°C. Without one, break the surface at the centre: the filling beneath should be bubbling and steaming. Never test the heat against your skin. If the top is done but the centre is not, cover loosely with foil and bake 10 minutes more.
Resting before serving
Rest every version of this pie for at least 5 minutes. The filling is at its loosest straight from the oven, and resting lets the gravy settle back around the mince so portions hold together. A dish of this size holds its heat well, so resting will not make it cold.
Practical tips and common mistakes
Thin gravy
Cause: too much stock, too short a simmer, or a lid left on the pan. Remedy: simmer uncovered until a spoon leaves a slow-closing trail. For a filling that is thin before assembly, mix 1 tablespoon of cornflour with 2 tablespoons of cold water, stir it in, and simmer for 2 minutes. Once the pie is assembled this cannot be done, so prevention matters most. The FAQs page summarises this fix.
Bland filling
Cause: under-seasoning, under-browned mince, or assuming salty stock is enough on its own. Remedy: brown the mince properly, then taste at the end of cooking and adjust — salt first, then a little more Worcestershire sauce if it still tastes flat.
Lumpy mash and gluey mash
Lumps come from unevenly cut or not-quite-cooked potatoes; test the largest chunk before draining, because hard lumps from undercooking cannot be mashed out. Gluey mash comes from a waxy variety or from a food processor or electric whisk; use floury potatoes and a hand masher, and work them only until smooth.
Mash sinking into the filling
Cause: the filling was too thin, or too hot, when the mash went on; wet mash makes it worse. Remedy: reduce the filling, let it stop steaming fiercely, make the mash firm, and dollop the potato on from the edges instead of dropping it into the centre of a liquid filling.
A pale topping and filling bubbling over
A pale top usually means wet mash, a smooth surface, an oven that was not fully heated, or a dish placed too low. Dry the potatoes well, fork the surface, use the middle shelf, and finish with 2 to 3 minutes under a hot grill if needed. Bubbling over usually means an overfilled dish or a thinner filling than it looked; leave 1 cm of headroom and always bake on a tray. It is not ruined if it does bubble — let the pie rest and the overflow settles back at the edges.
The wrong dish size
Measure the capacity with water if you are unsure. In a deep, narrow dish, add time and check the centre carefully, because heat takes longer to reach it. In a wide, shallow dish, check early, because a thin filling dries out faster.
Substitutions and variations
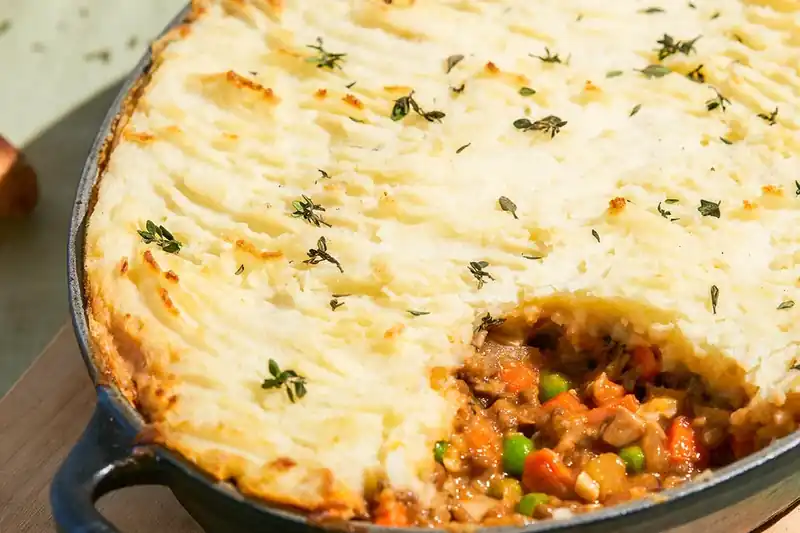
The options below keep the structure of the basic recipe. Where a change alters the identity of the dish, that is stated plainly. Testing status: these are suggestions based on standard cooking practice and have not been separately tested alongside this recipe. Treat the first attempt as a test, and expect small adjustments to liquid and seasoning. Full detail is on the Variations page.
| Swap | How to use it | What changes |
|---|---|---|
| Gluten-free | Replace the plain flour with cornflour mixed with cold water, stirred into the simmering filling near the end. Check the labels of your stock and Worcestershire sauce — some brands are gluten-free and some are not, and formulations change. | A glossier, slightly clearer sauce than flour gives. Cooking time stays the same. |
| Dairy-free mash | Swap the butter for a dairy-free spread or a tablespoon of olive oil, and the milk for an unsweetened plant milk or a few spoonfuls of potato cooking water. | Unsweetened is essential. Add liquid even more gradually — some alternatives slacken the mash suddenly. |
| Extra vegetables | Finely diced mushrooms, leeks, swede or parsnip. Hard vegetables go in with the carrot and celery; leeks with the onion; mushrooms after the mince has browned, with a few minutes to release their water. | Mushrooms and courgette release water, so you may need a longer simmer. Root vegetables absorb a little, so the filling may need a splash more stock. |
| Cheese topping | Scatter 50g grated mature Cheddar over the forked mash; season the mash itself a fraction more lightly, as the cheese adds salt. | A richer, more deeply browned top. Not required, and not traditional in a stricter sense. |
| Lamb mince | Same quantity and method; lamb or chicken stock suits it better than beef stock. | The dish becomes shepherd's pie. It is no longer a cottage pie. |
| Turkey mince | Same quantity; brown it well, as it colours less readily. Keep the full simmer and do not reduce the stock further. | A leaner filling that can dry out. |
| Lentils | For half-and-half, use 250g mince and about 200g cooked green or Puy lentils, added near the end of simmering. For meat-free, use about 400g cooked lentils, vegetable stock, and leave out the Worcestershire sauce or use a vegetarian alternative, because the standard sauce contains fish. | Call it a lentil cottage pie. Choose lentils that hold their shape — red lentils break down completely and are not suitable here. |
| Red wine (optional) | Pour in about 125ml after the tomato purée stage, bubble for 2 to 3 minutes, and reduce the stock by the same amount. | A deeper, slightly sharper flavour. The recipe does not need it. |
What to serve with cottage pie
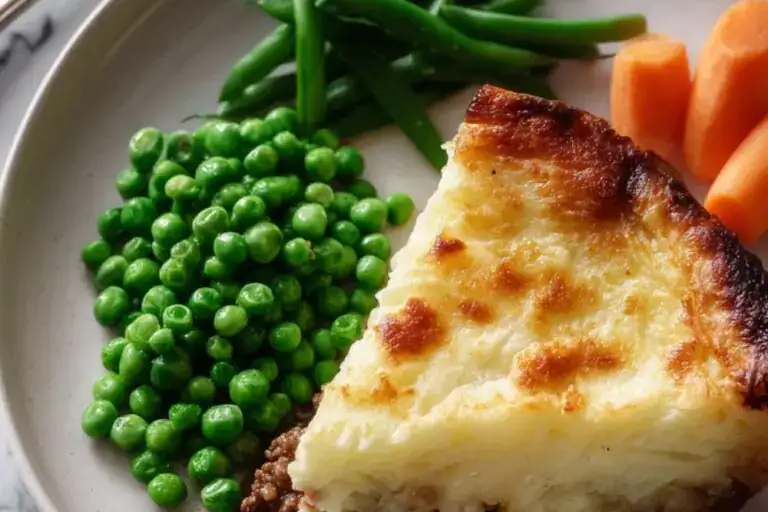
Cottage pie is a complete dish: it already contains meat, sauce and potato, so the sides that work best are simple and green. Buttered cabbage is the classic partner — mild, good at soaking up gravy, and a contrast to the richness. Green beans and peas do the same job with a fresher taste, and broccoli works well cooked until just tender. In warmer weather, a plain green salad gives a crisp contrast to a soft, rich pie. Avoid serving more potato in another form; chips or roast potatoes next to a mashed potato topping make the plate heavy and repetitive. Extra gravy is a matter of taste — this filling is well sauced, so make a small jug separately rather than thinning the filling to provide it.
Making ahead, storing, freezing and reheating
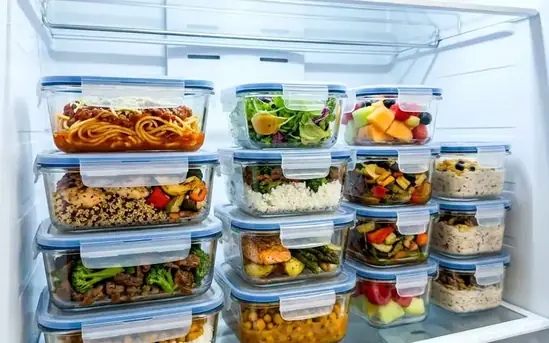
The safety points below follow current UK food safety guidance (Food Standards Agency and Food Standards Scotland, checked 27 October 2026) and are set out separately from the texture advice, because the two are not the same thing.
Preparing components and assembling ahead
Can cottage pie be assembled in advance? Yes. You can make the filling a day ahead — cool it, cover it and refrigerate it; the flavour often improves overnight. Mash can also be made ahead, although it is best fresh. Press cling film directly onto the surface and refrigerate it. Before spreading, let it come back towards room temperature, or warm it gently with a splash of milk. Assembling from cold components is easier in one way, as cold mash spreads over cold filling without the layers mixing. Bake a chilled, assembled pie at 200°C conventional / 180°C fan / Gas Mark 6 for about 35 to 40 minutes (estimate), checking the centre is piping hot, as described above.
Cooling and refrigeration
Cool cooked food as quickly as you reasonably can — ideally within one to two hours — then store it in the fridge, which should be between 0°C and 5°C. Splitting a large pie into smaller portions helps it cool faster, as a deep whole pie holds heat in the centre for a long time. Eat refrigerated leftovers within two days. Cover the dish or transfer portions to sealed containers, and label them with the date.
Freezing and defrosting
Cottage pie freezes well assembled but unbaked, or cooked and completely cooled. Portions freeze and defrost more evenly than a whole large pie; wrap well or use sealed freezer containers and label with the date. An unbaked frozen pie gives the best topping texture, because the potato is baked once, from defrosted. Defrost thoroughly in the fridge — overnight for a whole pie, several hours for a portion — and cook and eat within 24 hours of defrosting. Do not refreeze a defrosted pie, and do not defrost it on the worktop all day.
Reheating
Reheat leftovers only once, until steaming hot all the way through with no cold centre. For a portion in the oven, use 180°C conventional / 160°C fan / Gas Mark 4 for about 25 to 30 minutes, covered with foil for the first half so the top does not dry out, then uncovered to crisp again. In the microwave, use short bursts and stir or turn the portion partway through if the dish allows — mashed potato heats unevenly, so a single long blast can leave a cold patch in the middle of a very hot portion. Always check the centre: steaming at the edges is not enough on its own. This recipe is written to be defrosted first; no from-frozen cooking time is given, because defrosting in the fridge gives an even result and lets you check the centre reliably.
Scaling the recipe up or down
Halving
Use 250g of mince and half of everything else. Brown in a smaller pan if you have one, so the mince still has room. Use a smaller dish of roughly 750ml to 1 litre, so the layers stay at a similar depth — a half quantity spread across the full-size dish makes a thin pie that dries out. Baking time stays similar, perhaps 5 minutes less; judge by bubbling at the edges and a properly hot centre, not by halving the clock. Taste and adjust the seasoning rather than assuming halved salt is exactly right.
Doubling
Use 1kg of mince and double the other quantities. Brown the mince in two or three batches, without exception — a kilo in one pan will steam, and the whole dish will suffer for it. Use a much larger dish of about 5 to 6 litres, so the filling keeps a similar depth,, or split the pie between two dishes of the usual size, which is often easier: they heat more evenly, are lighter to lift, and one can be frozen. Do not double the baking time; a deeper filling needs perhaps 10 to 15 minutes more for its centre, and the top would burn if you simply doubled the time — cover with foil if the top colours first. Double the herbs, but add salt in stages. Two dishes need space between them for hot air to move; if they touch, or one is directly above the other, swap them around halfway through.
Frequently asked questions
These questions were chosen because they fit this recipe. They were not taken from any search feature, and are not presented as Google People Also Ask questions.
No. Cheese is an optional topping, not a defining ingredient. Plain mashed potato, properly forked and baked, gives the traditional top. Add 50g grated mature Cheddar if you want a richer, more deeply browned finish.
Yes, provided it was cooled and refrigerated properly and is still within the two-day window for leftovers. Warm it gently with a splash of milk first so it spreads without tearing the filling, and check its consistency — very soft leftover mash can slump. It must be piping hot by the end of baking, like the rest of the pie.
Floury varieties — Maris Piper and King Edward are the reliable choices, and most large supermarkets stock both. They break down as they cook, so they mash smoothly. Waxy and salad potatoes hold their shape instead, which makes them a poor fit for a topping.
Yes. This recipe uses no wine at all. Stock, tomato purée and Worcestershire sauce give the gravy enough depth without it.
Dry the potatoes: drain them well, return them to the hot pan for a minute to steam off, and add the milk gradually. Also reduce the filling properly before the mash goes on — a watery top is usually a watery filling showing through, wet potatoes, or both.
Yes. Divide the filling between ramekins or small ovenproof dishes, top each with mash, and fork the surfaces in the same way. They bake faster than one large pie — roughly 15 to 20 minutes with hot components (estimate) — so check the centre of one portion before serving the rest.
Yes, if it has been defrosted safely in the fridge first. Cook it as soon as it has thawed and brown it thoroughly, with no pink remaining. Frozen mince releases more liquid in the pan than fresh — pour off the excess and keep browning, or the filling will start thin and need a longer simmer.
Usually because the dish was overfilled, or the filling was thinner than it looked. Leave at least 1 cm between the top of the mash and the rim, and always stand the dish on a baking tray. A small amount of bubbling at the edges is normal and is your sign the pie is ready.
This recipe is written to be defrosted first, then baked or reheated. Defrosting in the fridge gives an even result and lets you check the centre reliably, so no from-frozen time is given here. Thaw thoroughly, then use the chilled-pie time in the making-ahead section.
No, although they are close relations. Cumberland pie also has a mashed potato topping, but it is traditionally finished with breadcrumbs and cheese over the potato. Add the optional cheese and a handful of breadcrumbs here and you are moving towards a Cumberland pie; without the breadcrumbs, it stays a cottage pie.
Questions about using this page
Tick each ingredient as you gather it or add it to the pan. Ticked items are struck through, so what is left on the list is what you still need. It is a shopping and cooking checklist, built into the recipe card.
It changes the ingredient quantities only. Oven temperatures, cooking times and the dish size stay exactly as written, because they do not scale in direct proportion to the ingredients. The scaling section on this page explains how to adjust those separately.
It makes the text larger and hides the header, footer and other distractions, so the method is easier to follow with messy hands. The separate “Keep Screen Awake” button asks your device to keep the screen on while you cook, where your browser supports it — it only runs when you switch it on.
Yes. The steps where timing matters most — browning, simmering, boiling and baking — have their own timer buttons. Each one starts a named timer in the timer panel. Remember to use Enable Sound on the timer first if you want the alarm to sound.
More questions are answered on our FAQs page.